How to Choose the Best Schick Dental Sensor for Clinics?

Choosing the right schick dental sensor can influence diagnostic clarity, workflow speed, and patient comfort. In a busy clinic, the decision involves more than image resolution. Staff may handle the sensor dozens of times each day, often while moving between operatories. A reliable model should fit existing imaging software, connect smoothly with the dental unit, and withstand routine disinfection procedures. Small details matter. A stiff cable can restrict positioning. A thick sensor may cause discomfort during posterior imaging.

Clinical experience should guide the evaluation. Dentists and dental assistants can test how easily the sensor enters different parts of the mouth. They should also review image quality under real conditions, not only in a supplier demonstration. Look closely at molar contacts, bone levels, and endodontic working areas. These details reveal practical performance. Manufacturer specifications remain useful, but they do not tell the whole story. Warranty terms, technical support, replacement procedures, and training resources deserve equal attention.

No sensor is perfect. A clinic may value durability more than the highest theoretical resolution. Another practice may prioritize portability, integration, or a smaller active area. Cost should be measured across the sensor’s expected service life, including repairs and downtime. That calculation is sometimes overlooked. Before purchasing, compare several compatible systems and ask staff to record their impressions. Their feedback may expose problems that a decision-maker misses. This guide explains the main factors clinics should assess when selecting a schick dental sensor, while acknowledging that the best choice depends on clinical needs, equipment, and daily working habits.
How to Choose the Best Schick Dental Sensor for Clinics?

Understanding Schick Dental Sensor Types and Core Imaging Features

Choosing a Schick dental sensor starts with its type, not its advertised resolution. Common options include direct digital sensors, phosphor plate systems, and panoramic or cephalometric units. Intraoral sensors usually offer immediate images, while phosphor plates feel more flexible in tight spaces. However, they require scanning and careful handling.

Core imaging features deserve practical attention. Compare active area, pixel size, contrast range, exposure tolerance, and connection method. A smaller pixel may reveal fine structures, but it can also increase file size and workflow demands. The World Health Organization reported that oral diseases affect nearly 3.5 billion people worldwide in its Global Oral Health Status Report 2022. That scale makes efficient imaging valuable, but speed should never replace diagnostic quality. The IAEA supports optimization through the ALARA principle, meaning exposure should remain as low as reasonably achievable. A clinic should test images at normal working distances, under real patient conditions. Laboratory samples can look too perfect.

Tips: Ask for sample cases with caries, endodontic files, and bone levels. Check whether the sensor tolerates repeated disinfection. Review warranty terms and software compatibility. Also measure the sensor’s active area, not only its external size. A cheaper unit may become expensive after cable failures, training time, and repeated retakes. I would not choose from resolution alone. Comfort matters. Staff feedback matters more than brochures. Independent evaluations, such as market analyses from Grand View Research, can indicate category growth, but they cannot replace a clinic-based trial.
Assessing Clinic Compatibility, Workflow, and Software Requirements

Choosing the right dental sensor starts with clinic compatibility, not specifications alone. Check the sensor’s active area, thickness, cable length, and physical durability. Fit matters. A larger sensor may capture more anatomy, but it can feel uncomfortable in smaller mouths. Test positioning with different patient sizes before making a purchase.

Workflow deserves equal attention. Observe how assistants prepare rooms, place barriers, capture images, and disinfect equipment. A sensor that slows these steps can reduce daily efficiency. Ask whether the device supports quick image capture between procedures. Review cable handling, storage, and replacement access. Small details matter. Staff feedback often reveals problems that product demonstrations miss.

Software requirements can determine long-term value. Confirm compatibility with the clinic’s imaging platform, operating systems, and patient-record workflow. Check image export formats, user permissions, backup procedures, and update policies. In practice, integration failures create more frustration than hardware limits. Request a live trial using your own computers and typical examination routines. A spreadsheet can help, but it cannot reveal every chairside problem. Some teams focus heavily on resolution and overlook training time. That is a reasonable mistake, but it deserves reflection before approval. Ask the provider for technical documentation, service response times, and clear warranty conditions. Reliable support is part of the sensor, even when it is not visible in the specification sheet.

How to Choose the Best Dental Sensor for Clinics?

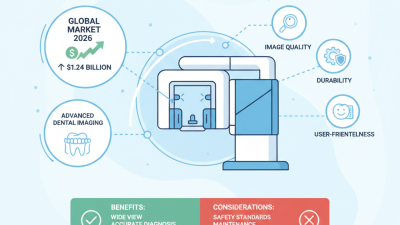
Clinic-fit assessment across compatibility, workflow, image quality, infection control, durability, and software integration.

Scores use a practical 1–5 clinic assessment scale, where 5 represents the highest priority. Compatibility and software integration should be verified with the clinic’s existing imaging systems, operating systems, image formats, and clinical workflow before purchase.

Comparing Image Quality, Sensor Size, Comfort, and Durability

Choosing a dental sensor for a clinic requires more than comparing prices. Image quality should support accurate diagnosis without repeated exposures. Look for clear contrast, visible fine structures, and consistent results across different patient positions. In daily use, I check images on the clinic monitor, not only in product brochures. A sensor with strong software compatibility can also reduce delays between capture and review.

Sensor size affects both access and patient comfort. Smaller sensors often work better for children, narrow arches, and posterior teeth. Larger sensors may cover more anatomy, but they can feel awkward during positioning. Rounded edges and a flexible cable matter when patients have sensitive gums. Comfort influences cooperation. It can also affect image accuracy when a patient moves.

Durability deserves practical attention. I examine the cable connection, protective casing, and cleaning instructions before purchase. A sensor may survive routine handling but fail after repeated bending or unsuitable disinfection. That detail is easy to overlook. Ask for documented testing, repair procedures, and realistic warranty terms. I once focused too heavily on resolution and underestimated cable strain during busy sessions. That choice created avoidable interruptions. A reliable sensor should fit the clinic’s workflow, staff habits, and patient needs, not just perform well in a demonstration.

Evaluating Infection Control, Warranty, Support, and Total Cost

Choosing the best dental sensor requires more than comparing image quality or purchase prices. Infection control should be tested in daily conditions.

During a clinic evaluation, inspect the sensor cable, edges, and connector after repeated barrier changes. Smooth surfaces reduce cleaning problems. Confirm which disinfectants the manufacturer approves. Some chemicals can damage housings or shorten cable life. Check whether the sensor tolerates routine wiping without swelling, cracking, or discoloration. A barrier is helpful, but it is not a complete cleaning strategy. Staff should receive clear handling instructions.

Warranty terms deserve close attention. Check coverage length, accidental damage exclusions, repair procedures, and expected replacement times. Ask whether loaner units are available during service. Support quality often becomes visible after a difficult installation, not during a sales demonstration. Request software training, troubleshooting guides, and a named technical contact. Vague promises are not enough.

Total cost includes more than the invoice. Add protective barriers, mounting accessories, software fees, staff training, repairs, and possible downtime. A lower-priced sensor may become expensive after one cable failure. Estimate the number of patients and exposures each week. Then compare replacement risk over three to five years. I would also test positioning with smaller patients. In practice, a sensor that feels slightly bulky can slow appointments. That detail is easy to overlook. Still, comfort feedback from staff and patients may be inconsistent, so record observations instead of trusting one impression.

Selecting the Best Schick Dental Sensor for Your Clinical Needs

How to Choose the Best Schick Dental Sensor for Clinics?

Selecting the best Schick dental sensor starts with your clinical workflow, not the highest advertised resolution. The WHO Global Oral Health Status Report estimates that 3.5 billion people live with oral diseases worldwide. That scale makes fast, repeatable imaging essential in busy clinics. Choose a sensor with a comfortable active area, durable cable, and clear images at a reasonable exposure level. Pixel size matters, but practical positioning matters more. A sensor that causes frequent retakes wastes time and increases patient exposure.

Check compatibility with your imaging software and existing chairside systems. Ask whether the sensor supports bitewing, endodontic, and pediatric examinations without awkward repositioning. Review the manufacturer’s stated resolution, warranty terms, disinfection instructions, and ingress protection rating. International guidance from the IAEA emphasizes justification and optimization of dental exposures, so dose efficiency deserves careful attention. Do not trust one specification alone. Real-world tests are better. Request sample images from molars, narrow roots, and overlapping contacts.

Clinic feedback often reveals weaknesses that brochures hide. Staff may dislike a stiff cable, sharp edges, or slow image transfer. That matters. A 2023 review in Dentomaxillofacial Radiology also highlighted positioning and technique as major influences on diagnostic image quality. I would test the sensor for two weeks before purchasing, although that trial may not represent every operator. Record retake rates, patient comfort, and average workflow time. Then compare those findings with your budget and service support.

How to Choose the Best Schick Dental Sensor for Clinics? - Selecting the Best Schick Dental Sensor for Your Clinical Needs
Selection Criterion Compact Sensor
Size 0
Child & Small-Arch Sensor
Size 1
General Adult Sensor
Size 2
Clinical Recommendation
Primary Clinical Use Small children, anterior teeth, and limited-space examinations Children, adolescents, and adults with smaller arches Routine adult bitewing, periapical, and posterior imaging Choose the smallest sensor that still covers the required anatomical region without repeated exposures.
Typical Sensor Size Approximately 20 × 30 mm active area Approximately 24 × 33 mm active area Approximately 27 × 39 mm active area Confirm the manufacturer’s external dimensions, since the housing is larger than the active imaging area.
Patient Comfort Highest comfort for small mouths Good balance between comfort and coverage More coverage, but may feel bulky in narrow arches Prioritize thinner edges, rounded corners, and flexible positioning for patients with a strong gag reflex.
Anatomical Coverage Limited coverage; best for selected anterior regions Moderate coverage for anterior and selected posterior regions Broad coverage for adult posterior regions Use size 2 when the examination requires broad posterior coverage or routine adult bitewing imaging.
Pixel Pitch Typically about 15–25 μm Typically about 15–25 μm Typically about 15–25 μm A smaller pixel pitch can support higher theoretical detail, but positioning, motion control, and exposure technique also affect image quality.
Theoretical Spatial Resolution Approximately 20–33 lp/mm, depending on pixel pitch Approximately 20–33 lp/mm, depending on pixel pitch Approximately 20–33 lp/mm, depending on pixel pitch Compare measured or declared resolution consistently; theoretical resolution should not be treated as equivalent to diagnostic performance.
Common Examination Types Anterior periapicals, selected endodontic views, pediatric images Anterior and premolar periapicals, pediatric bitewings Adult bitewings, molar periapicals, implant and periodontal assessments A clinic serving mixed age groups may benefit from maintaining at least two sensor sizes.
Connection Method Direct USB or network-connected interface, depending on system design Direct USB or network-connected interface, depending on system design Direct USB or network-connected interface, depending on system design Select a system compatible with the clinic’s imaging software, operating system, and available connection ports.
Image Acquisition Workflow Immediate digital image capture after positioning Immediate digital image capture after positioning Immediate digital image capture after positioning Evaluate acquisition speed, software workflow, image export options, and ease of retaking an incorrectly positioned image.
Infection-Control Requirements Use a single-use hygienic barrier; disinfect according to the instructions for use Use a single-use hygienic barrier; disinfect according to the instructions for use Use a single-use hygienic barrier; disinfect according to the instructions for use Do not immerse or heat-sterilize a sensor unless the specific device is explicitly approved for that method.
Durability Considerations Protect against cable bending, drops, and bite pressure Protect against cable bending, drops, and bite pressure Protect against cable bending, drops, and bite pressure Check cable strain relief, drop resistance, warranty coverage, repair policy, and replacement cost before purchase.
Positioning Accessories Small holders and pediatric positioning aids are preferred Size-specific holders improve alignment and repeatability Adult bitewing and periapical holders are commonly required Include compatible holders in the total purchasing plan; incorrect holders can increase retakes and patient discomfort.
Best Fit for Clinic Type Pediatric, orthodontic, and family clinics with many small patients Family clinics and practices with mixed patient sizes General dental, periodontal, endodontic, and implant practices Base the final choice on patient demographics, examination mix, operator preference, and expected daily workload.
Key Buying Decision Comfort and access in limited oral space Versatility and balanced coverage Coverage and efficiency for routine adult imaging For a broad clinical service range, a size 1 plus size 2 combination is often more flexible than relying on one sensor size.
Note: Dimensions, pixel pitch, resolution, connection options, and infection-control procedures vary by individual sensor model. Always verify the current technical specifications and instructions for use before purchase or clinical operation.